🚀 Introducing Stac — A Server Driven UI framework for Flutter
Mobile apps have existed for quite a long time since the launch of AppStore and PlayStore in 2008, until today when there are millions of apps out there. But in this time frame, it’s not only the number of apps that have changed. Apps have become much more dynamic, personalized, and smart.
Yet, one thing hasn’t changed: how we publish mobile apps.
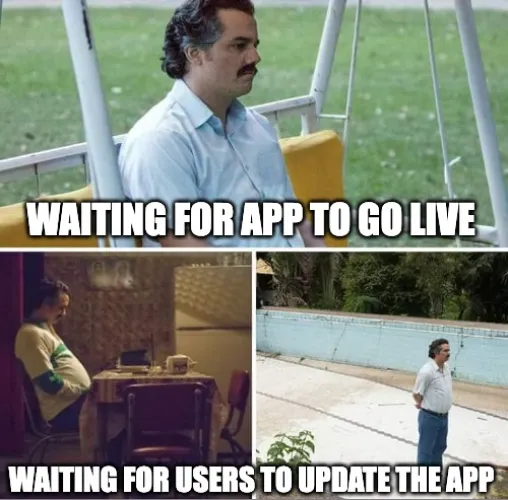
It’s still the same tedious process. You push updates to the store, wait for approval (sometimes praying it doesn’t get stuck in review limbo), and then hope users actually bother to update their app. Oh, and if there’s a bug? Welcome to emergency patch territory. sigh 😮💨

What if you could escape the tedious app update cycle entirely? Imagine sending updates on the fly and steering the UI directly from the server — no delays, no approvals. That’s exactly what Server-Driven UI is all about.
To understand Server-Driven UI, let’s first talk about the traditional approach, i.e. Client-Driven UI.
What is Client-Driven UI?
In the traditional Client-Driven UI approach, the app’s UI is tightly coupled with its codebase. Essentially, the client (your app) handles everything — UI layouts, business logic, and rendering. Want to change how a button looks or add a new feature? You’ll need to update the app’s code, test it, and then push the update to the app stores. And then comes the waiting game: store approvals followed by users actually updating their apps. Sound familiar? Yeah, it’s exhausting.
While this approach works, it has some glaring limitations:
- Slow Update Cycles: Even minor UI tweaks require a full update process.
- Scalability Issues: Managing multiple platforms becomes a headache as each app has its own codebase.
- Lack of Flexibility: Changes aren’t instantaneous — you’re at the mercy of app store approvals and user behavior.
What is Server-Driven UI (SDUI)?
Server-Driven UI (SDUI) is a paradigm where the server drives the UI, rather than the UI being hardcoded in the app itself. Instead of the client app determining what to render, it primarily focuses on how to render the components defined by the server.
Think of it like a browser rendering a website. Your browser doesn’t know ahead of time what content it’s going to display — it just knows how to interpret and render tags. Similarly, in SDUI, the app is equipped to render widgets or components sent by the server, making the UI dynamic, flexible, and completely server-controlled.
Here’s how does Server-Driven UI works:
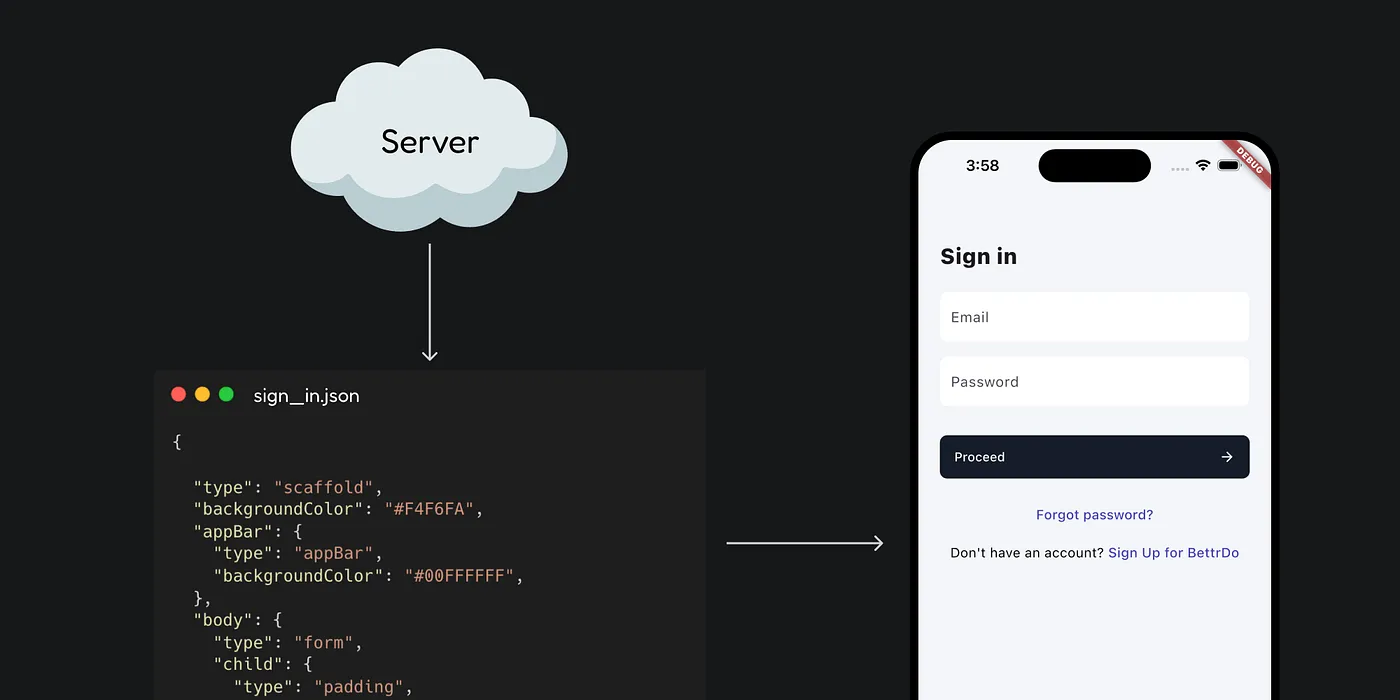
- The server defines the app’s UI (typically in a lightweight format like JSON).
- The client (your app) receives these definitions and renders the UI dynamically.
- Any changes to the UI? Just update the server, and the app instantly reflects them — no app updates required!

But building Server-Driven UI is hard — you need to support countless Flutter widgets, manage complex navigation, handle network calls, and efficiently manage state, all while ensuring seamless compatibility and top-notch performance. That’s exactly where Stac saves the day.
Introducing Stac 🚀
Meet Stac (formerly Mirai), the powerful Server-Driven UI (SDUI) framework built specifically for Flutter. With Stac, you can build stunning, cross-platform applications dynamically, using JSON to define your UI in real time.
Installing Stac
To get started with Stac, follow the installation instructions below:
- Add the Stac dependency to your
pubspec.yamlfile:
Run the following command:
flutter pub add stacThis will add Stac to your package’s pubspec.yaml (and run an implicit flutter pub get):
Alternatively, you can manually add the dependency to your app from within your pubspec.yaml:
dependencies: stac: ^<latest-version>- Run the following command in your terminal to install the package:
flutter pub get- Import the Stac package in your Dart file:
import 'package:stac/stac.dart';Now, you’re ready to start using Stac in your Flutter project.
Initializing Stac
In the main function, initialize Stac to set up the necessary configurations, and prepare your app for rendering UI from JSON.
void main() async { await Stac.initialize(); runApp(const MyApp());}That’s it. Now that your app is SDUI packed you can use Stac.fromJson(), Stac.fromAsset() or Stac.fromNetwork() method to render UI.
Defining Stac JSONs
Stac JSONs are designed to feel familiar, especially if you’ve worked with Flutter’s widget structure. In fact, Stac JSONs are essentially the JSON equivalent of Flutter widgets — they mirror the same hierarchy and logic, just in a different format.
Here’s the magic: if you can write a Flutter widget tree, you can easily define a Stac JSON. Let’s compare:
Flutter Widget:
Column( children: [ Text("Hello, Stac!"), ElevatedButton( onPressed: () => print("Button Pressed"), child: Text("Click Me"), ), ],)Stac JSON Equivalent:
{ "type": "column", "children": [ { "type": "text", "data": "Hello, Stac!" }, { "type": "elevatedButton", "onPressed": { "action": "print", "message": "Button Pressed" }, "child": { "type": "text", "data": "Click Me" } } ]}See the resemblance? It’s like translating your Flutter widgets into JSON. The structure remains intuitive, so you’re not learning a whole new paradigm — you’re just writing Flutter in JSON form.
Key Benefits of Stac
- Instant UI Updates : Skip the hassle of app updates and store approvals. With SDUI, changes made on the server go live instantly, ensuring your app stays up-to-date at all times.
- Personalization Made Easy: Deliver unique, tailored experiences to users by serving different UIs based on preferences, behaviors, or demographics — all without touching client-side code.
- Simplified Maintenance: Manage your UI logic centrally on the server. This reduces the complexity of maintaining multiple app versions and keeps updates consistent across platforms.
- Effortless A/B Testing: Experiment with multiple UI versions in real-time by serving variant payloads directly from the server. Gain insights and iterate faster without additional development cycles.
- Reduced Development Overhead: Focus your efforts on backend logic while the server handles UI updates. This minimizes client-side development, making your workflow faster and more efficient.
Form screen example with Stac
Let’s see Stac in action by building a simple Sign-In Screen.

Server-Side JSON Definition
Here’s how the server defines the Sign-In screen in Stac JSON:
{
"type": "scaffold", "backgroundColor": "#F4F6FA", "appBar": { "type": "appBar", "backgroundColor": "#00FFFFFF", }, "body": { "type": "form", "child": { "type": "padding", "padding": {"left": 24, "right": 24}, "child": { "type": "column", "crossAxisAlignment": "start", "children": [ { "type": "text", "data": "Sign in", "style": {"fontSize": 24, "fontWeight": "w800", "height": 1.3} }, {"type": "sizedBox", "height": 24}, { "type": "textFormField", "id": "email", "autovalidateMode": "onUserInteraction", "validatorRules": [ {"rule": "isEmail", "message": "Please enter a valid email"} ], "style": {"fontSize": 16, "fontWeight": "w400", "height": 1.5}, "decoration": { "hintText": "Email", "filled": true, "fillColor": "#FFFFFF", "border": { "type": "outlineInputBorder", "borderRadius": 8, "color": "#24151D29" } } }, {"type": "sizedBox", "height": 16}, { "type": "textFormField", "autovalidateMode": "onUserInteraction", "validatorRules": [ {"rule": "isPassword", "message": "Please enter a valid password"} ], "obscureText": true, "maxLines": 1, "style": {"fontSize": 16, "fontWeight": "w400", "height": 1.5}, "decoration": { "hintText": "Password", "filled": true, "fillColor": "#FFFFFF", "border": { "type": "outlineInputBorder", "borderRadius": 8, "color": "#24151D29" } } }, {"type": "sizedBox", "height": 32}, { "type": "filledButton", "style": { "backgroundColor": "#151D29", "shape": {"borderRadius": 8} }, "onPressed": { "actionType": "none", }, "child": { "type": "padding", "padding": {"top": 14, "bottom": 14, "left": 16, "right": 16}, "child": { "type": "row", "mainAxisAlignment": "spaceBetween", "children": [ {"type": "text", "data": "Proceed"}, { "type": "icon", "iconType": "material", "icon": "arrow_forward" } ] } } }, {"type": "sizedBox", "height": 16}, { "type": "align", "alignment": "center", "child": { "type": "textButton", "onPressed": { "actionType": "none", }, "child": { "type": "text", "data": "Forgot password?", "style": { "fontSize": 15, "fontWeight": "w500", "color": "#4745B4" } } } }, {"type": "sizedBox", "height": 8}, { "type": "align", "alignment": "center", "child": { "type": "text", "data": "Don't have an account? ", "style": { "fontSize": 15, "fontWeight": "w400", "color": "#000000" }, "children": [ { "data": "Sign Up for BettrDo", "style": { "fontSize": 15, "fontWeight": "w500", "color": "#4745B4" } } ] } } ] } } }}Client-Side Implementation
Here’s how to render the server-defined UI on the client side using Stac.fromNetwork method.
import 'package:flutter/material.dart';import 'package:stac/stac.dart';
void main() async { await Stac.initialize(); runApp(const MyApp());}
class MyApp extends StatelessWidget { const MyApp({super.key});
@override Widget build(BuildContext context) { return MaterialApp( title: 'Stac App', theme: ThemeData(), home: Stac.fromNetwork( request: StacNetworkRequest( url: 'https://example.com/ui.json', ), context: context, ), ); }}With just a few lines of code and a JSON definition, you’ve got a dynamic sign-in screen powered by Stac. It’s that simple! 🚀
What’s Next?
Ready to explore Stac? Head over to our GitHub to dive into the code, check out our detailed docs to get started, and experiment with dynamic UIs in real-time using the Stac Playground. It’s everything you need to build smarter, faster, and better apps with Stac!
Stay tuned for more in-depth blogs on Stac, where we’ll explore advanced features, best practices, and real-world examples to help you unlock its full potential! 🌟
